Painting the interior of your home can breathe new life into your space, making it feel fresh, clean, and modern.
However, preparing a house for painting the interior is just as important as the painting itself.
Proper prep work ensures a smooth, professional-looking finish, saves time, and prevents costly mistakes.
In this guide, we’ll walk you through the essential steps to get your home ready for a flawless paint job—and why, after all the effort, hiring a professional painter might be the smartest choice.
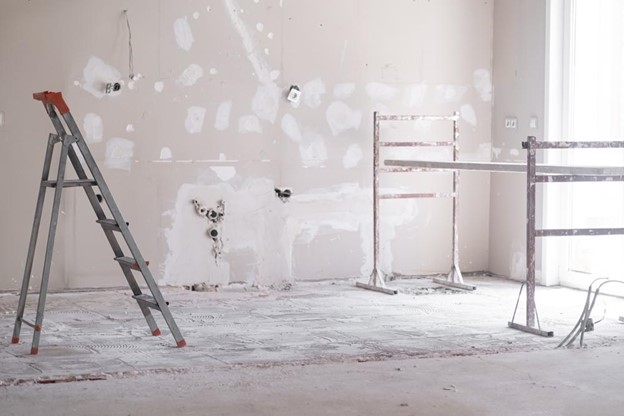
Step 1: Clear the Space (or Cover Everything)
Furniture and décor are the first things that can get in the way—or worse, get splattered with paint.
If possible, move furniture out of the room entirely. If that’s not an option, push everything to the center and cover it with plastic sheets or drop cloths.
- Remove artwork, mirrors, and wall-mounted shelves
- Take down curtains and blinds (paint splatters are sneaky)
- Roll up rugs and protect flooring with canvas drop cloths
Don’t rely on old bedsheets or newspapers for protection—paint can easily seep through them. Instead, use thick plastic sheets or professional-grade drop cloths to safeguard your belongings.
Step 2: Clean Walls and Surfaces
Paint adheres best to clean surfaces, so don’t skip this step. Dust, grime, and even tiny oil particles from cooking can interfere with how well the paint sticks, leading to an uneven finish.
- Dust walls with a microfiber cloth or a duster
- Wash walls with a mixture of mild detergent and warm water
- Focus on high-touch areas like light switches and door frames
- Let everything dry completely before moving on
If you're dealing with mold or mildew, use a solution of water and white vinegar to remove it. Painting over mildew without treating it first is a guaranteed way to see it resurface later.
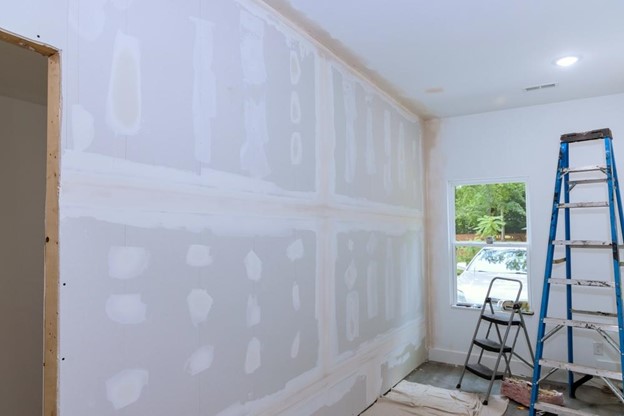
Step 3: Patch Holes and Repair Imperfections
Any cracks, holes, or dents in the walls will still be visible after painting unless they’re properly patched.
- Fill nail holes and small dents with spackling compound
- Use joint compound for larger cracks or damaged areas
- Sand the patched spots until smooth once they’re dry
- Wipe away dust with a damp cloth
This step is crucial. Even high-quality paint can’t hide imperfections, so take the time to get your walls as smooth as possible before moving forward.
Step 4: Apply Painter’s Tape
If you want crisp, clean lines where walls meet trim, ceilings, or other surfaces, painter’s tape is your best friend. But there’s a right way to apply it:
- Use high-quality painter’s tape—not masking tape, which leaves residue
- Press it firmly along baseboards, window frames, and trim
- Seal the edges well to prevent paint from bleeding underneath
- Remove the tape at an angle before the paint fully dries to avoid peeling
A little patience here will save you from hours of frustrating touch-ups later.
Step 5: Prime the Walls (When Necessary)
Primer isn’t always necessary, but in some cases, it makes all the difference. You should prime if:
- You’re painting over a dark or bold color with a lighter shade
- The walls are stained or have water damage
- You’re painting new drywall that has never been painted before
Primer helps with coverage, ensuring your new paint color looks even and vibrant. It also improves adhesion, making the paint less likely to chip or peel over time.
Step 6: Ventilate the Room
Before painting begins, make sure you have proper ventilation. Even low-VOC (volatile organic compound) paints can have a strong odor, so open windows and use fans to keep the air moving.
- Position box fans near windows to pull fumes out of the room
- Keep doors open to allow airflow between spaces
- Consider using an air purifier if painting multiple rooms
Proper ventilation helps the paint dry faster and minimizes exposure to fumes, making the process more comfortable and safe.
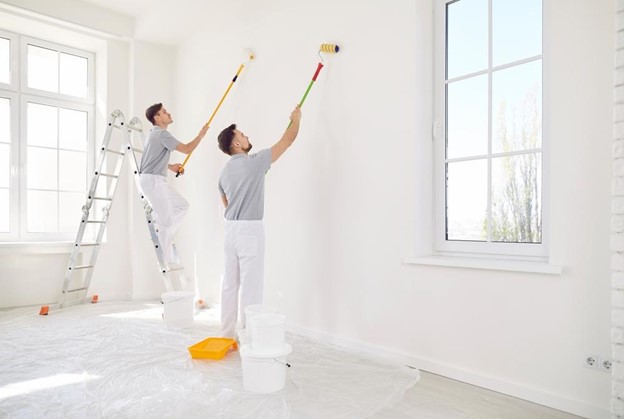
Step 7: Gather the Right Tools
You don’t want to start painting only to realize you’re missing something important. Before opening a paint can, gather everything you need:
- High-quality rollers and brushes
- Paint trays and liners
- A sturdy ladder for reaching ceilings
- A paint mixer or stir stick
- Rags for quick cleanups
If you’re using different finishes (e.g., matte for walls, semi-gloss for trim), make sure you have the right brushes and rollers for each.
After All This Work, Is DIY Worth It?
By now, you might be thinking, “That’s a lot of work before I even start painting.” And you’re right—preparing a house for painting the interior is a time-consuming and detail-oriented process.
While painting might seem like a simple weekend project, the reality is that achieving a professional finish requires patience, skill, and experience.
A single missed step—like not properly sanding patched areas or failing to tape edges correctly—can result in a less-than-perfect result.
And if you’re tackling a large project, like multiple rooms or high ceilings, the effort required can quickly become overwhelming.
Why Hiring a Professional Painter is the Best Choice
While DIY painting can be tempting, bringing in a professional ensures top-quality results with less hassle.
Save Time and Effort
Professional interior painters handle everything—from prepping surfaces to applying the perfect coat of paint—so you don’t have to. What might take a DIYer several weekends can often be done in just a few days by a skilled team.
Achieve a Flawless Finish
Pros have the right tools, techniques, and experience to ensure crisp lines, smooth walls, and even color distribution. They know which paints work best in different areas and how to apply them for a long-lasting finish.
No Stress Over Cleanup
Painting isn’t just about putting color on the walls; there’s also a lot of cleanup involved. A professional team will take care of it all, leaving your home looking spotless and ready to enjoy.
Ready for a Professional Paint Job? Let MG House Painting Handle It!
If preparing a house for painting the interior feels overwhelming, hiring a professional is the best choice.
MG House Painting offers top-quality painting services in Halifax, ensuring a flawless finish without the hassle of DIY.
Contact us today for a free consultation and let our experts transform your space with precision and care.